The whole logistics of this project has kinda caused some doubt at times. I found inspiration not only in the books by continually picking them up and reviewing and reading the Timber framers Guild website www.tfguild.org/ . Seeing what others have done has helped me to figure out that although it may be difficult and a slow process that if I continue one step at a time then maybe some day I would finish the project, or have an awfully large pile of wood! Since I have limited space to store timbers and also work on the timbers, not to mention how would I move these things around since apparently they can weigh 150 to 300 pounds apiece I had to learn from how others had accomplished this task. I figured if I could cut the beams then either I could load them on a uhaul or drive my tandem trailer down, load them up and drive them to the construction site and store them until they were all stacked neatly ready for framing. As far as inspiration I was delighted to come across a blog written by a professor who basically did the same thing. He cut the timbers of a small cabin at home and hauled them to his building site in the mountains of Wyoming approximately 8 hrs away and in a much more remote site than I have. He even had to cope with heavy snowstorms of which I doubt I'll have that problem. His blog is
http://www.mvr1.com/timberframing/timberframecabin.html, I hope he doesn't mind me putting this link up. Below is a pic of my method of moving these beams around.
Below is another pic of my pattern placement and my makeshift shop table. The blue book I am working from is a divided into joint sections with to scale drawings of each joint which can be transferred to the 1/2 in oak plywood to make a more permanent template.
As you can see I would cut out the design from the book and insert it into the book with my scaled drawings. The books are very good about describing the joints and sometimes the structural requirements.
Below are the templates cut out from the to scale drawings above.
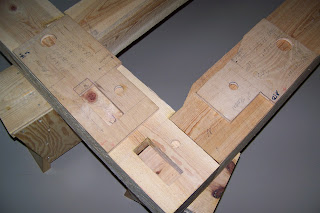
Below I have laid out the templates next to their completed and fitted joints. These templates were extremely helpful in envisioning the completed joint when I was staring at a blank piece of wood.
I even had a template for the side view to complete the 3d picture in my head. Maybe I have a thick head!
I also tried to get into the habit of numbering and labeling these joints and beams as they describe in the books I had purchased. As they explain this will be very helpful in the assembly process. Every time I cut these out It amazes me at the time and attention to detail necessary to make this all come out in the end. Also the number of joints that I would have to successfully complete would overwhelm me if I dwelled on it so I would focus on one section at a time. I did the drawings below for a 10x10 top plate but decided to go with an 8x8 so I will have to redraw these and cut out new templates.


No comments:
Post a Comment